728x90

SQL Server 2005 Cluster 설치 후 Fail-over 테스트 과정에서 SQL Agent Service 가 온라인 되지 않는
문제가 발생하였습니다.  Passive Node 의 메모리 옵션에서 페이지 잠그기 옵션을 활성화 하여 SQL Server
실행 권한을 가진 계정을 추가해야 하는 이슈입니다.


[환경]
Windows Server 2003 Enterprise Edition SP2
SQL Server 2005 (MSCS)
 

[현상]
SQL Server 2005 Cluster 설치 후 Passive Node로 Fail-over 하였을 때 SQL Agent Service 가 온라인 되지
않습니다.

 
[원인]
AWE 메모리를 이용하려면, 메모리 권한에 잠금 페이지가 할당된 계정에서 SQL Server 데이터베이스 엔진을
실행해야 합니다. SQL Server 설정 권한이 MSSQLServer 서비스 계정 권한에 자동으로 부여되므로 메모리의
페이지 잠그기 사용할 수 있습니다. 현재 Passive Node 에는 로컬 보안 정책 '메모리의 페이지 잠금' 권한이
없습니다.
 

[분석결과]
 
1. 이벤트 로그
 
 이벤트 형식:        오류
 이벤트 원본:        SQLSERVERAGENT
 이벤트 범주:        Failover
 이벤트 ID:        53
 날짜:                2008-06-10
 시간:                오전 5:32:11
 사용자:                N/A
 컴퓨터:        LAIGO
 설명:
 [sqagtres] OnlineThread: Error 435 bringing resource online.

 
2. SQL Error Log
 
 SQL Server blocked access to
프로시저 'dbo.sp_sqlagent_get_startup_info' of component 'Agent XPs'
 because this component is turned off as part of the security configuration for this server.
 A system administrator can enable the use of 'Agent XPs' by using sp_configure.
 For more information about enabling 'Agent XPs', see "Surface Area Configuration" in SQL Server Books Online.
 

3. Passive Node에서 SP_configure 쿼리
 
 sp_configure

 Agent XPs 0 1 1 0
 awe enabled 0 1 1 0

 
 RECONFIGURE; 

  AWE(Address Windowing Extensions)에는 현재 프로세스의 액세스 토큰에 없는 '메모리의 페이지 잠금' 권한이 있어야 합니다.

 
[해결 방법]
 
메모리 옵션에서 페이지 잠금을 활성화하려면
 1. 시작 메뉴에서 실행을 누른 다음 열기 상자에 gpedit.msc를 입력합니다.
 2. 그룹 정책 트리 창에서 컴퓨터 구성을 확장한 다음 Windows 설정을 확장합니다.
 3. 계속해서 보안 설정과 로컬 정책을 차례로 확장합니다.
 4. 사용자 권한 할당 폴더를 선택합니다.
 5. 로컬 정책이 세부 정보 창에 표시됩니다.
 6. 세부 정보 창에서 메모리의 페이지 잠그기를 두 번 누릅니다.
 7. 로컬 보안 정책 설정 대화 상자에서 추가를 누릅니다.
 8. 사용자 또는 그룹 선택 대화 상자에서 Sqlservr.exe 실행 권한이 있는 계정을 추가합니다.
  - LAIGO\SQLCluster

 
[참고자료]
How to: Enable the Lock Pages in Memory Option (Windows)
http://technet.microsoft.com/en-us/library/ms190730.aspx


작성자 : Lai Go / 작성일자 : 2008.06.11
728x90

P/L SQL PACKAGE

오라클 데이터베이스에 저장되어 있는 프로시저, 함수들의 집합체이며 패키지의 구성은

선언부(Specification)과 본문(Body)로 구성됨.


1. 형식


--Specification 부분

CREATE [OR REPLACE] PACKAGE package_name

[AUTHID {CURRENT_USER | DEFINER}]

{IS | AS }

[PRAGMA SERIALLY_REUSABLE;]

[collection_type_definition …]

[record_type-definition …]

[subtype_definition …]

[collection_declaration …]

[constant_declaration …]

[exception_declaration …]

[object_declaration …]

[record_declaration …]

[variable_declaration …]

[cursor_spec …]

[function_spec …]

[procedure_spec …]

[call_spec …]

[PRAGMA RESTRICT_REFERENCES (assertions) …]

END [package_name];


--Body 부분

[CREATE [OR REPLACE] PACKAGE BODY package_name {IS | AS}

[PRAGMA SERIALLY_REUSABLE;]

[collection_type_definition …]

[record_type-definition …]

[subtype_definition …]

[collection_declaration …]

[constant_declaration …]

[exception_declaration …]

[object_declaration …]

[record_declaration …]

[variable_declaration …]

[cursor_body …]

[function_spec …]

[procedure_spec …]

[call_spec …]

[BEGIN

  squence_of_statements]

END [package_name]; ]


여기서 패키지 선언부(Specification)은 패키지에 포함될 PL/SQL 프로시저 및 함수 외에 퍼블릭(Public) 변수 선언과 커서(Cursor) 및 예외절 등을 포함한다.

여기서 퍼블릭 변수는 패키지 전체에 적용되는 변수임을 기억하자.

다음으로 패키지 본문(Body)는 패키지 선언부에서 선언된 변수들, 프로시저, 함수 들을 정의하는 부분이다.


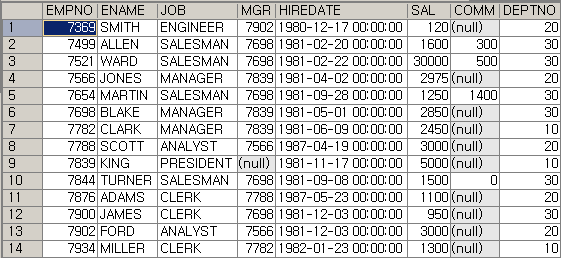
실제 EMP 테이블의 클론인 EMP_BACK 테이블을 가지고 알아보자.


사용자 삽입 이미지

2. 패키지 선언과 본문 스크립

--패키지 선언(Specification)

CREATE OR REPLACE PACKAGE emp_back_pack

IS

  v_counter NUMBER :=0;

  PROCEDURE empno_out;

  PROCEDURE ename_out;

  PROCEDURE job_out;

  PROCEDURE hiredate_out; 

  PROCEDURE deptno_out;

  PROCEDURE salary_out;

END emp_back_pack;

/


--패키지 본문(BODY)

CREATE OR REPLACE PACKAGE BODY emp_back_pack

IS

  -- emp_back_cursor 생성

  CURSOR emp_back_cursor IS

    SELECT * FROM EMP_BACK;


  -- emp_back_procedure

  PROCEDURE empno_out IS

  BEGIN

               DBMS_OUTPUT.ENABLE;

                DBMS_OUTPUT.PUT_LINE('직원번호');

                DBMS_OUTPUT.PUT_LINE('--------------');


                FOR crec IN emp_back_cursor LOOP

                            DBMS_OUTPUT.PUT_LINE('       ' || TO_CHAR(crec.empno));

                END LOOP;

  END empno_out;


  -- emp_back_ename_out 

  PROCEDURE ename_out IS 

  BEGIN

               DBMS_OUTPUT.ENABLE;

                DBMS_OUTPUT.PUT_LINE('직원이름');

                DBMS_OUTPUT.PUT_LINE('--------------');         


                FOR crec IN emp_back_cursor LOOP

                            DBMS_OUTPUT.PUT_LINE('       ' || crec.ename);

                END LOOP;

  END ename_out;  


  -- emp_back_job_out 

  PROCEDURE job_out IS 

  BEGIN

               DBMS_OUTPUT.ENABLE;

                DBMS_OUTPUT.PUT_LINE('업무 직함');

                DBMS_OUTPUT.PUT_LINE('--------------');         


                FOR crec IN emp_back_cursor LOOP

                            DBMS_OUTPUT.PUT_LINE('       ' || crec.job);

                END LOOP;

  END job_out;


  -- emp_back_hiredate_out 

  PROCEDURE hiredate_out IS 

  BEGIN

               DBMS_OUTPUT.ENABLE;

                DBMS_OUTPUT.PUT_LINE('입사일');

                DBMS_OUTPUT.PUT_LINE('--------------');         


                FOR crec IN emp_back_cursor LOOP

                            DBMS_OUTPUT.PUT_LINE('       ' || crec.hiredate);

                END LOOP;

  END hiredate_out;


  -- emp_back_deptno_out 

  PROCEDURE deptno_out IS 

  BEGIN

               DBMS_OUTPUT.ENABLE;

                DBMS_OUTPUT.PUT_LINE('부서번호');

                DBMS_OUTPUT.PUT_LINE('--------------');         


                FOR crec IN emp_back_cursor LOOP

                            DBMS_OUTPUT.PUT_LINE('       ' || TO_CHAR(crec.deptno));

                END LOOP;

  END deptno_out;  


  -- emp_back_salary_out 

  PROCEDURE salary_out IS 

  BEGIN

               DBMS_OUTPUT.ENABLE;

                DBMS_OUTPUT.PUT_LINE('월급');

                DBMS_OUTPUT.PUT_LINE('--------------');         


                FOR crec IN emp_back_cursor LOOP

                            DBMS_OUTPUT.PUT_LINE('       ' || TO_CHAR(crec.sal));

                END LOOP;

  END salary_out;  

END emp_back_pack;

/


3. 실행 결과

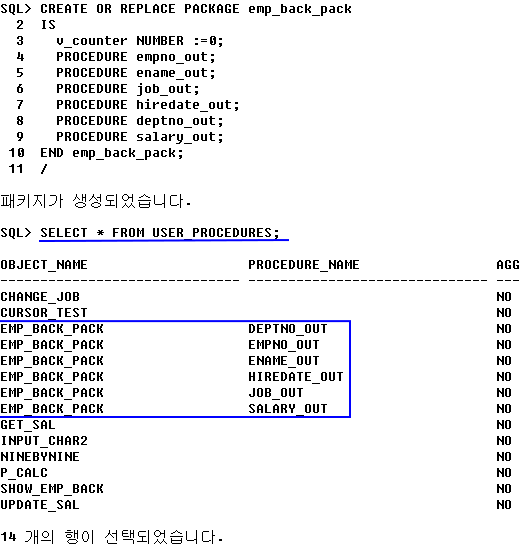
패키지 선언부 생성


사용자 삽입 이미지

                         
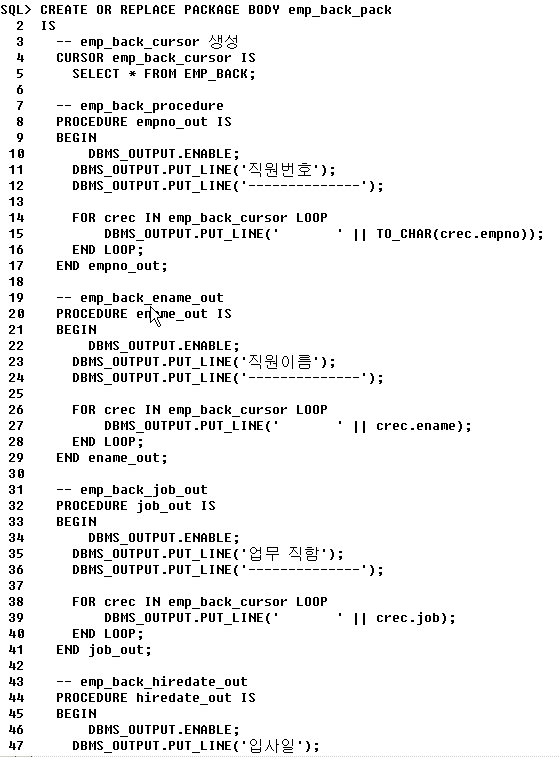
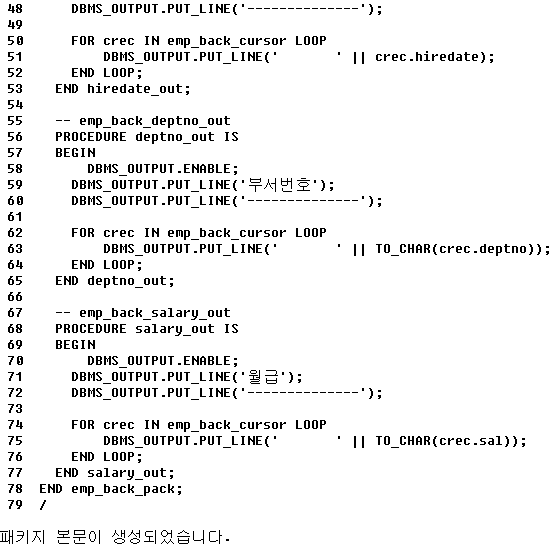
패키지 본문 생성
사용자 삽입 이미지
사용자 삽입 이미지
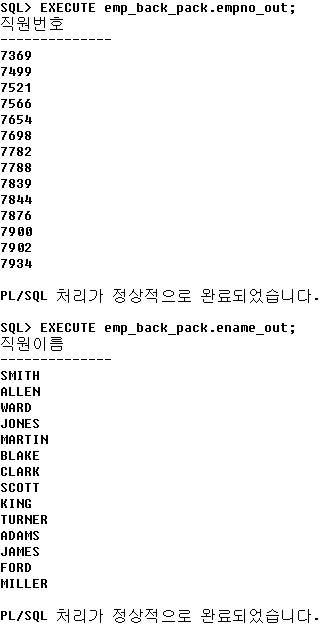
실행결과
사용자 삽입 이미지

SQL>SET SERVEROUTPUT ON 을 실행한 후 위와 같이 EXECUTE 문을 써서 실행하면
원하는 결과를 얻을 수 있음.

출처 : http://infomercial.tistory.com/168

'데이터베이스 > 오라클' 카테고리의 다른 글

오라클 NLS_LANG 설정변경  (0) 2010.08.16
Oracle 시스템정보보기 관련 쿼리  (0) 2010.08.16
View, Sequence, Synonym, Index  (0) 2010.08.16
오라클 데이터사전  (0) 2010.08.16
인덱스 저장위치 설정  (0) 2010.08.16
728x90

declare @tab varchar(256)
declare tabinfo cursor for
select name from sysobjects where xtype='u' order by name --사용자 정의 테이블
open tabinfo
fetch from tabinfo into @tab
while @@fetch_status=0
begin
 select @tab

 select
  syscolumns.name,
  ISNULL(value, '') as FLD_DESC,
  systypes.name,
  syscolumns.length,
  case isnullable when 0 then 'NOT NULL' else 'NULL'
  end 'Nullable'
 from
  systypes,
  syscolumns left outer join
  ::fn_listextendedproperty (NULL, 'user', 'dbo', 'table',@tab, 'column', default) c
  on (syscolumns.name = c.objname collate Korean_Wansung_CI_AS )
 where
  syscolumns.id=object_id(@tab)
 and syscolumns.xusertype =systypes.xusertype
 order by colid
 fetch from tabinfo into @tab
end
close tabinfo
deallocate tabinfo

출처 : http://kr.blog.yahoo.com/fazio127/7

+ Recent posts